Name Ding Tutorial
This is my first tut and it has two parts. I hope I have written it well enough to follow.
~~~Start Copy Here~~~
You may use this tutorial but, please leave my name intact. This was written with the intent to teach others and if you use it please respect my name and my hard work as you would have me do the same for you. Thank you. Della aka StarAngel1967®
Name Dings Tutorial
For this tut you need eyecandy4000, VM Natural sparkles(for second half), And of course psp. I have psp7.02.
Open a 400 x 400 window making it transparent for the background.
Using text tool, add your name to the window using the following settings:
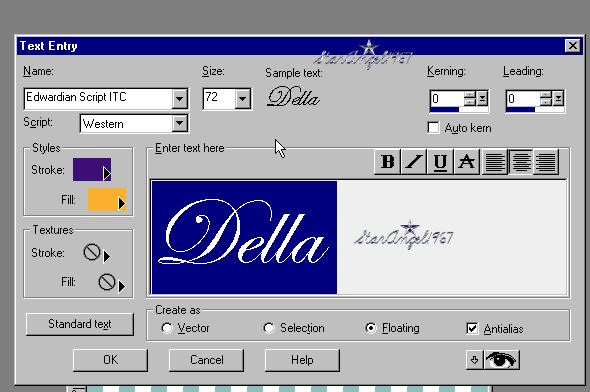
Thin fonts are best and color doesn't matter.
Now click on layers and duplicate 3 times:
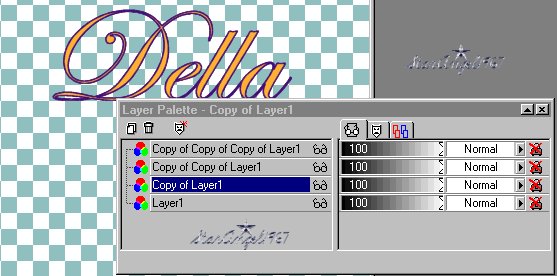
Above you see the layers palette. Click on copy of layer one and flip image.
Make the next layer (copy of copy of layer 1) active and mirror image.
Make the last layer active and mirror and flip this layer. You should now have a ding like this:

merge all visible layers:
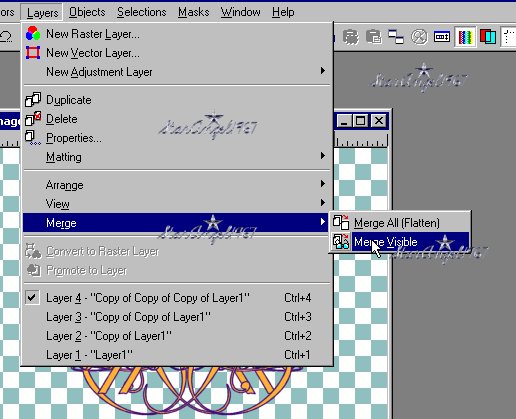
Click on effects/eyecandy4000/chrome.
Here are the settings I used:
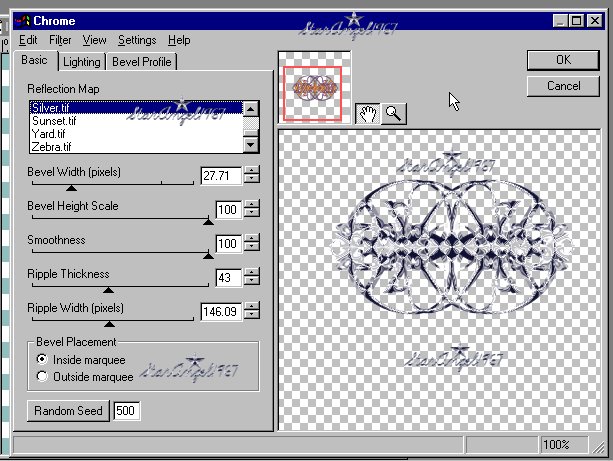
Once you have chromed it, chrome it again using slightly changed settings playing to get what you like.
Now click on Layers and make a new raster layer. Use your text tool to create your name again using the font sized down a bit to the next smaller level.
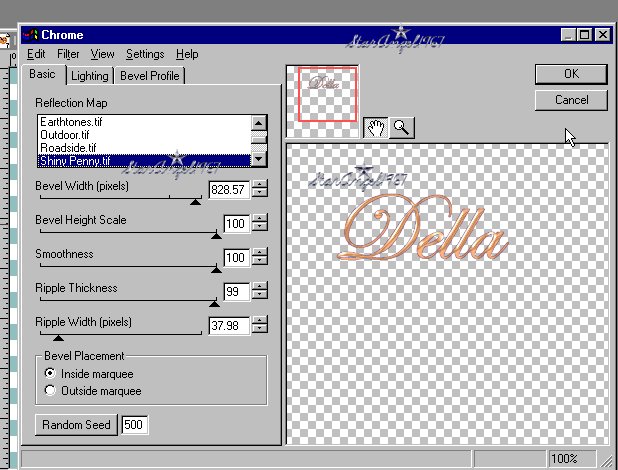
This time I chromed my name using shiny penny...
***optional***
you can do this again playing with the settings to change it slightly
Next, place it directly in the center of your ding and make a new raster layer:
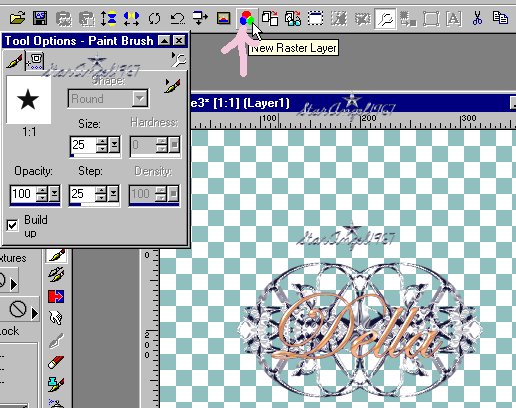
Choosing your brush click on tool toggle and click on the little brush inside the toolbox(pictured above)
Use the settings:
whatever your pic is(mine is the star)
size: 23
opacity: 100
hardness: 0
build up: checked
I placed stars where I wanted them.
Now click on effects/plugins/eyecandy4000/chrome and play with the settings to see what you like (mine is below):
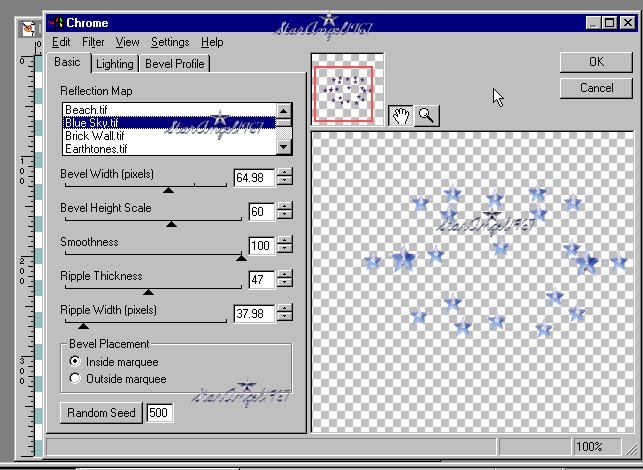
I played with it til I got just what I wanted.
Now merge all layers visible.
Create a new raster layer and create any background you like. I like it best on a dark or a light colored background...colors in the middle shades don't look as nice.
Once you have floodfilled a background for it, slide the background behind the name ding by clicking on the layer palette and left click and drag the raster layer to the bottom so that the ding layer is on top.
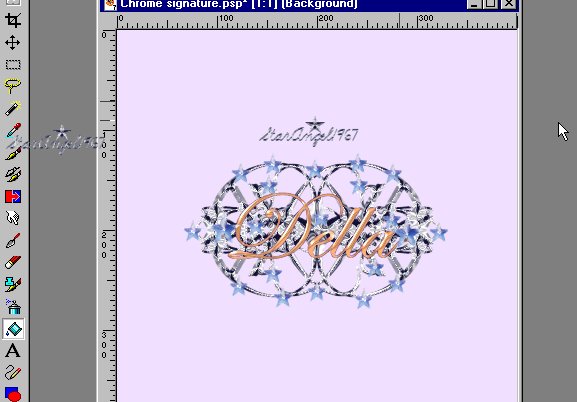
Add a drop shadow with by clicking on effects/plugins/eyecandy4000/shadowlab and set it so that the shadow just gives depth and is not a big shadow on the piece.
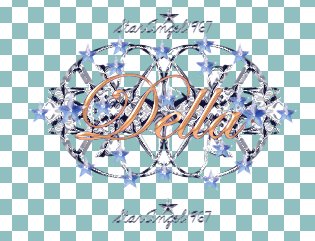
Crop to size so you don't have a giant background. Merge all flatten and then resize to 50%.
Play and have fun and send the results so I can put some onto my website
Simply Weekend Angels (SWA)
(http://ourworld-top.cs.com/StarAngel1967/index.htm)
here are my results from this part:

 <<<This is just the chromed
 ding of my name so you can see the detail.
I will send another mail for part 2.
Have Fun! Hugs,
Della aka StarAngel1967®
created on 3/3/2001.
~~~~End Copy Here~~~~
